Project Storefront
Each Faraway Platform Project can setup its own custom Storefront on the Faraway Shop as soon as the project is published. Your Storefront is where users can buy In-App Purchases" as well as browse and trade items from your Collections**.
Launch Storefront
Once your Project is published, you can launch your Storefront.
Steps to Launch Your Storefront
Required role: Account Owner, Admin, Developer, Marketing.
- In the left sidebar, click on the Storefront section.
- Click on the Create Storefront button.
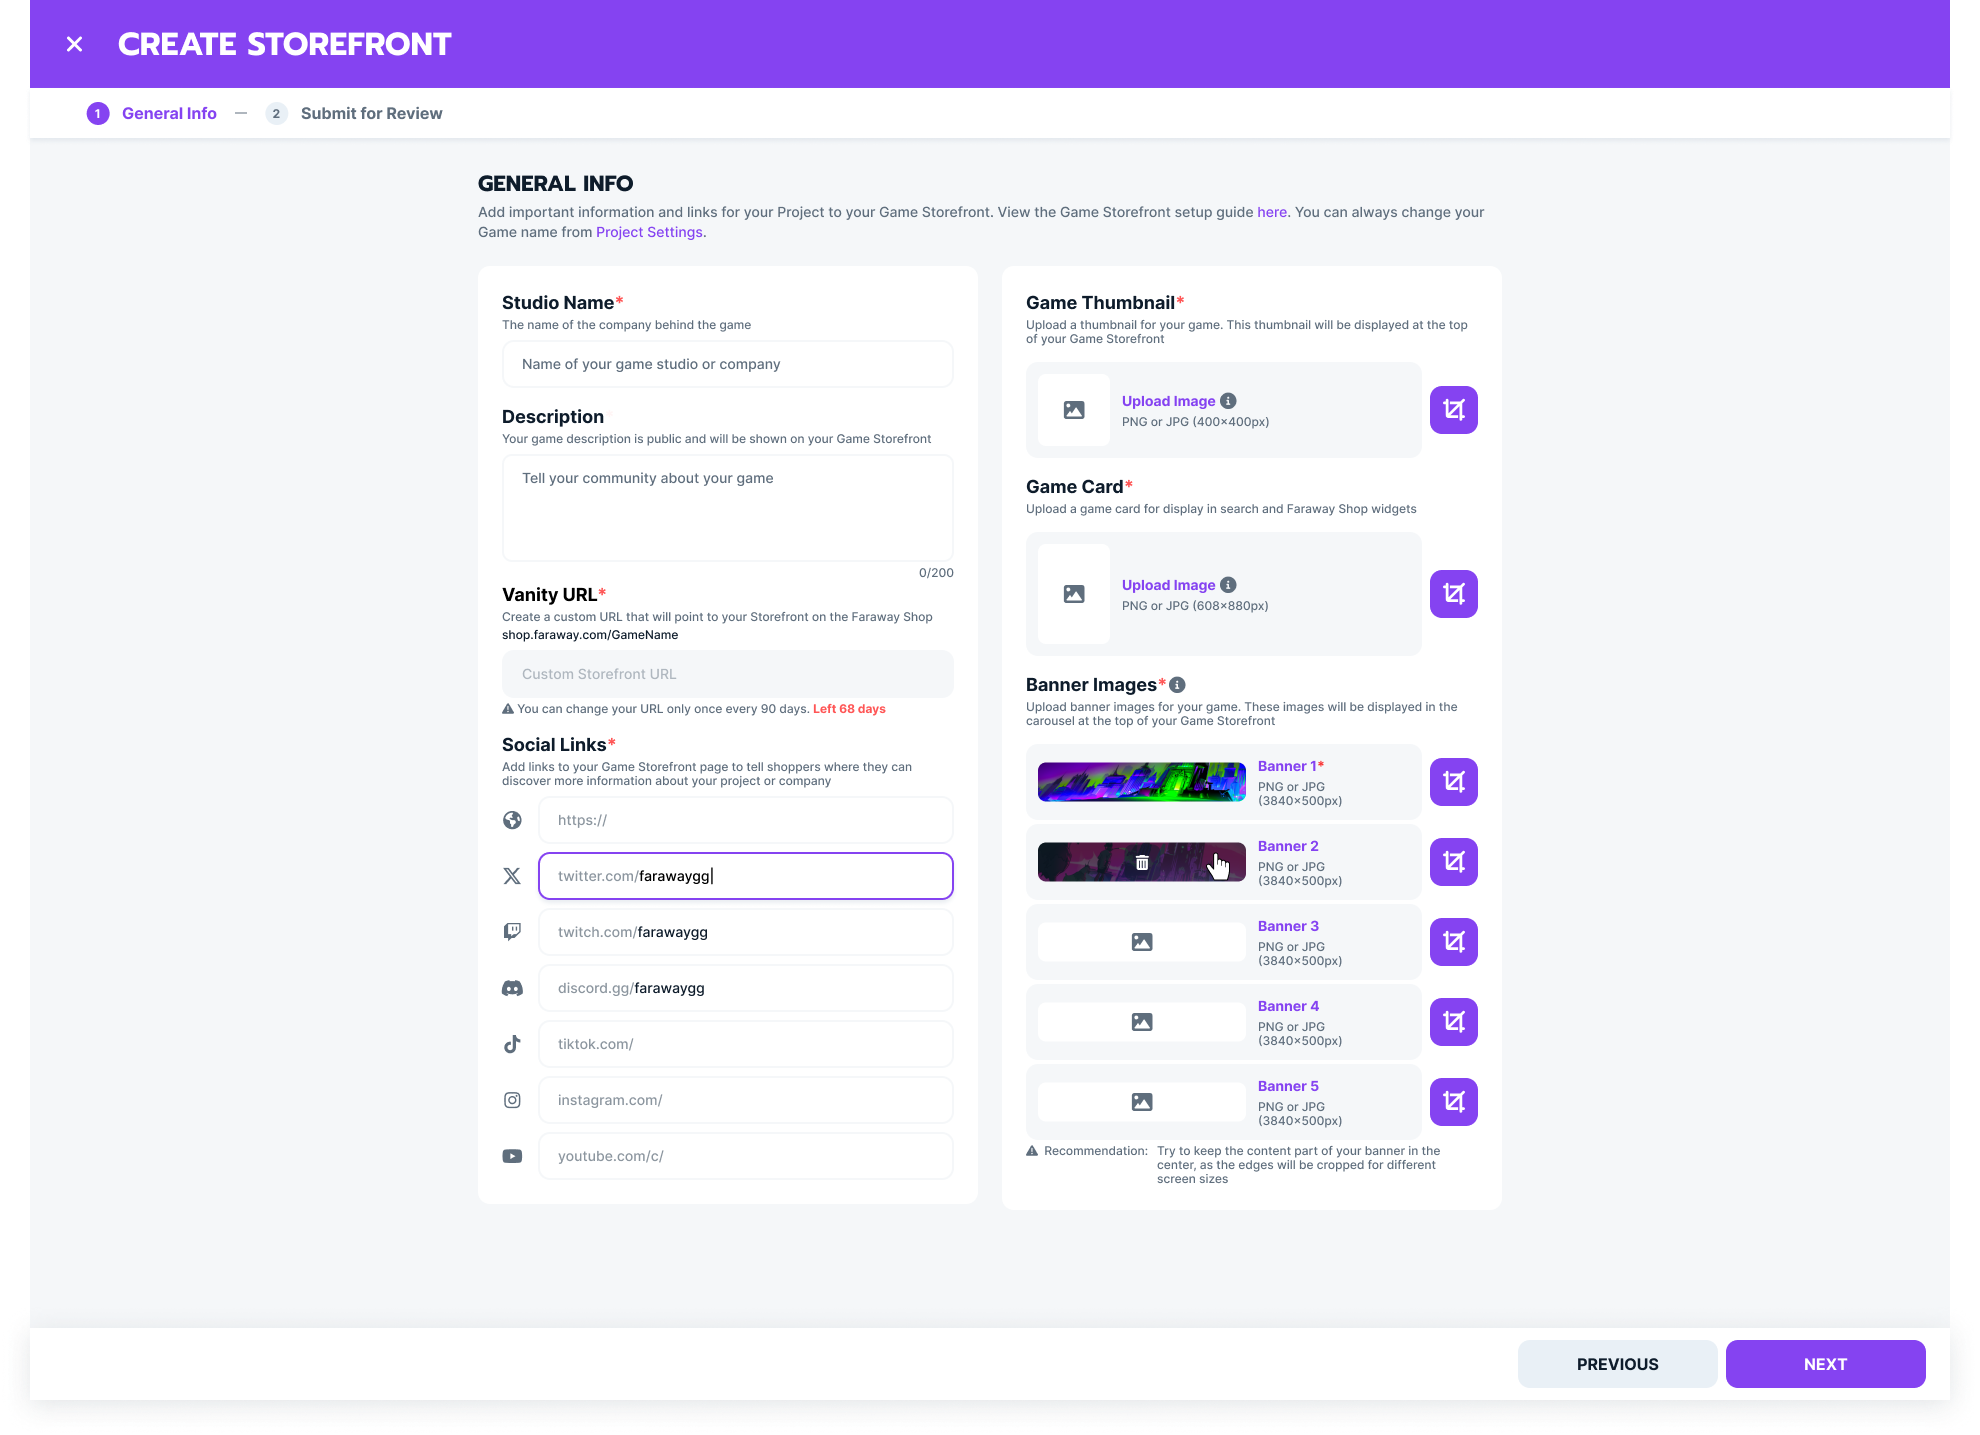
- In the dialog that appears, specify the following details:
- Studio Name:
- Up to 50 characters, Latin script, numbers, and special characters are allowed
- This name will be displayed on your Storefront page and may also be used for marketing purposes
- Description:
- Up to 1200 characters, Latin script, numbers, and special characters are allowed
- This description will be visible on your Storefront page and may be used in marketing materials
- Vanity URL:
- Customize the link to your Storefront. The URL must be unique and can only be changed once every 90 days.
- If you encounter issues and need to change your Vanity URL, please contact support at [email protected].
- Social Links:
- Links to external resources or information about your Project
- Recommended: Add a link to a website where users can learn more about your game
- Optional: Add download links for your game and links to your game’s social media pages
- Banners:
- Images displayed in the header carousel of your Storefront
- Requirements: Up to 5 images, each 3840x500 pixels
- Thumbnail:
- The avatar of your Storefront
- Requirements: 800x800 pixels
- Game Card:
- An extended version of your Project’s thumbnail used for marketing purposes and display on the Faraway Shop featuring pages
- Requirements: 1000x1000 pixels.
- Studio Name:
- After adding all necessary information, click Next and confirm submitting your Storefront for review.
Publish Storefront
Before your Game Storefront is activated on the Faraway Shop, it must be approved by the Faraway Moderation Team. This review process may take up to 3 days. After passing moderation, you can publish your Storefront to the Faraway Shop.
Steps to Publish Your Storefront:
- Once your Storefront is approved, click on the Launch Storefront button in the Storefront Guide
- You can update your Game Storefront anytime after publishing
List your Collections
You can list your Project Collections in your Storefront and allow Faraway Shop users to trade items from these collections peer-to-peer. You will collect royalties with each trade.
Steps to List a Collection
Required role: Account Owner, Admin, Developer, Marketing.
- In the left sidebar, click on the Storefront section and then go to the Collections section
- Choose the Collection you want to list. Only Deployed Collections are displayed in this section
- Open the table menu for the Collection you want to list and choose Edit.

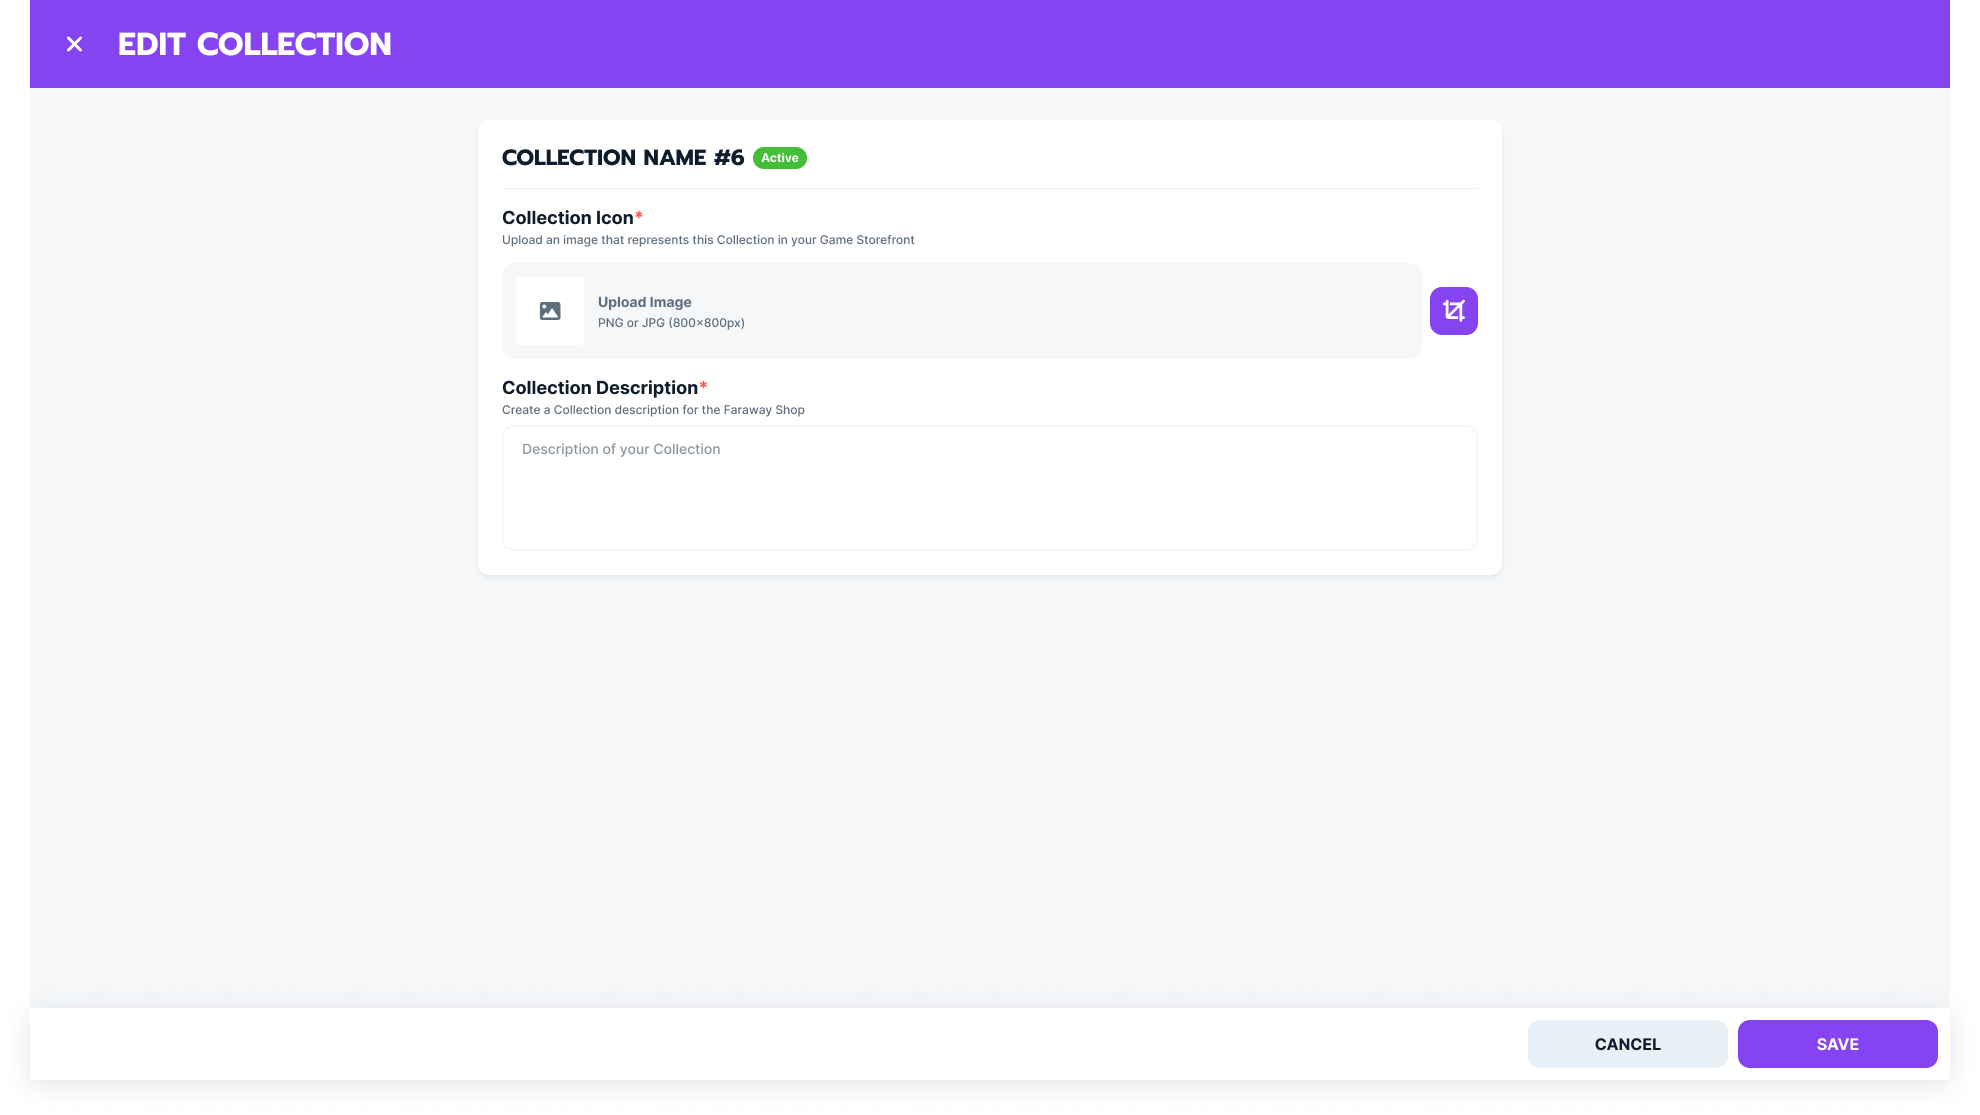
- In the window that appears, specify the following:
- Collection Description:
- Up to 255 characters, Latin characters, numbers, and special characters
- Collection Icon:
- Image size: 600x600 pixels
- The icon will be shown as the avatar for your Collection and may also be used for marketing purposes.
- If the items in your Collection share the same image, we recommend using an item image as the Collection icon.
- Click Save to save the changes.
- Go back to the list of Collections, open the table menu for the Collection you edited, and click Publish

- In the window that appears, confirm the Collection info and Publish your Collection
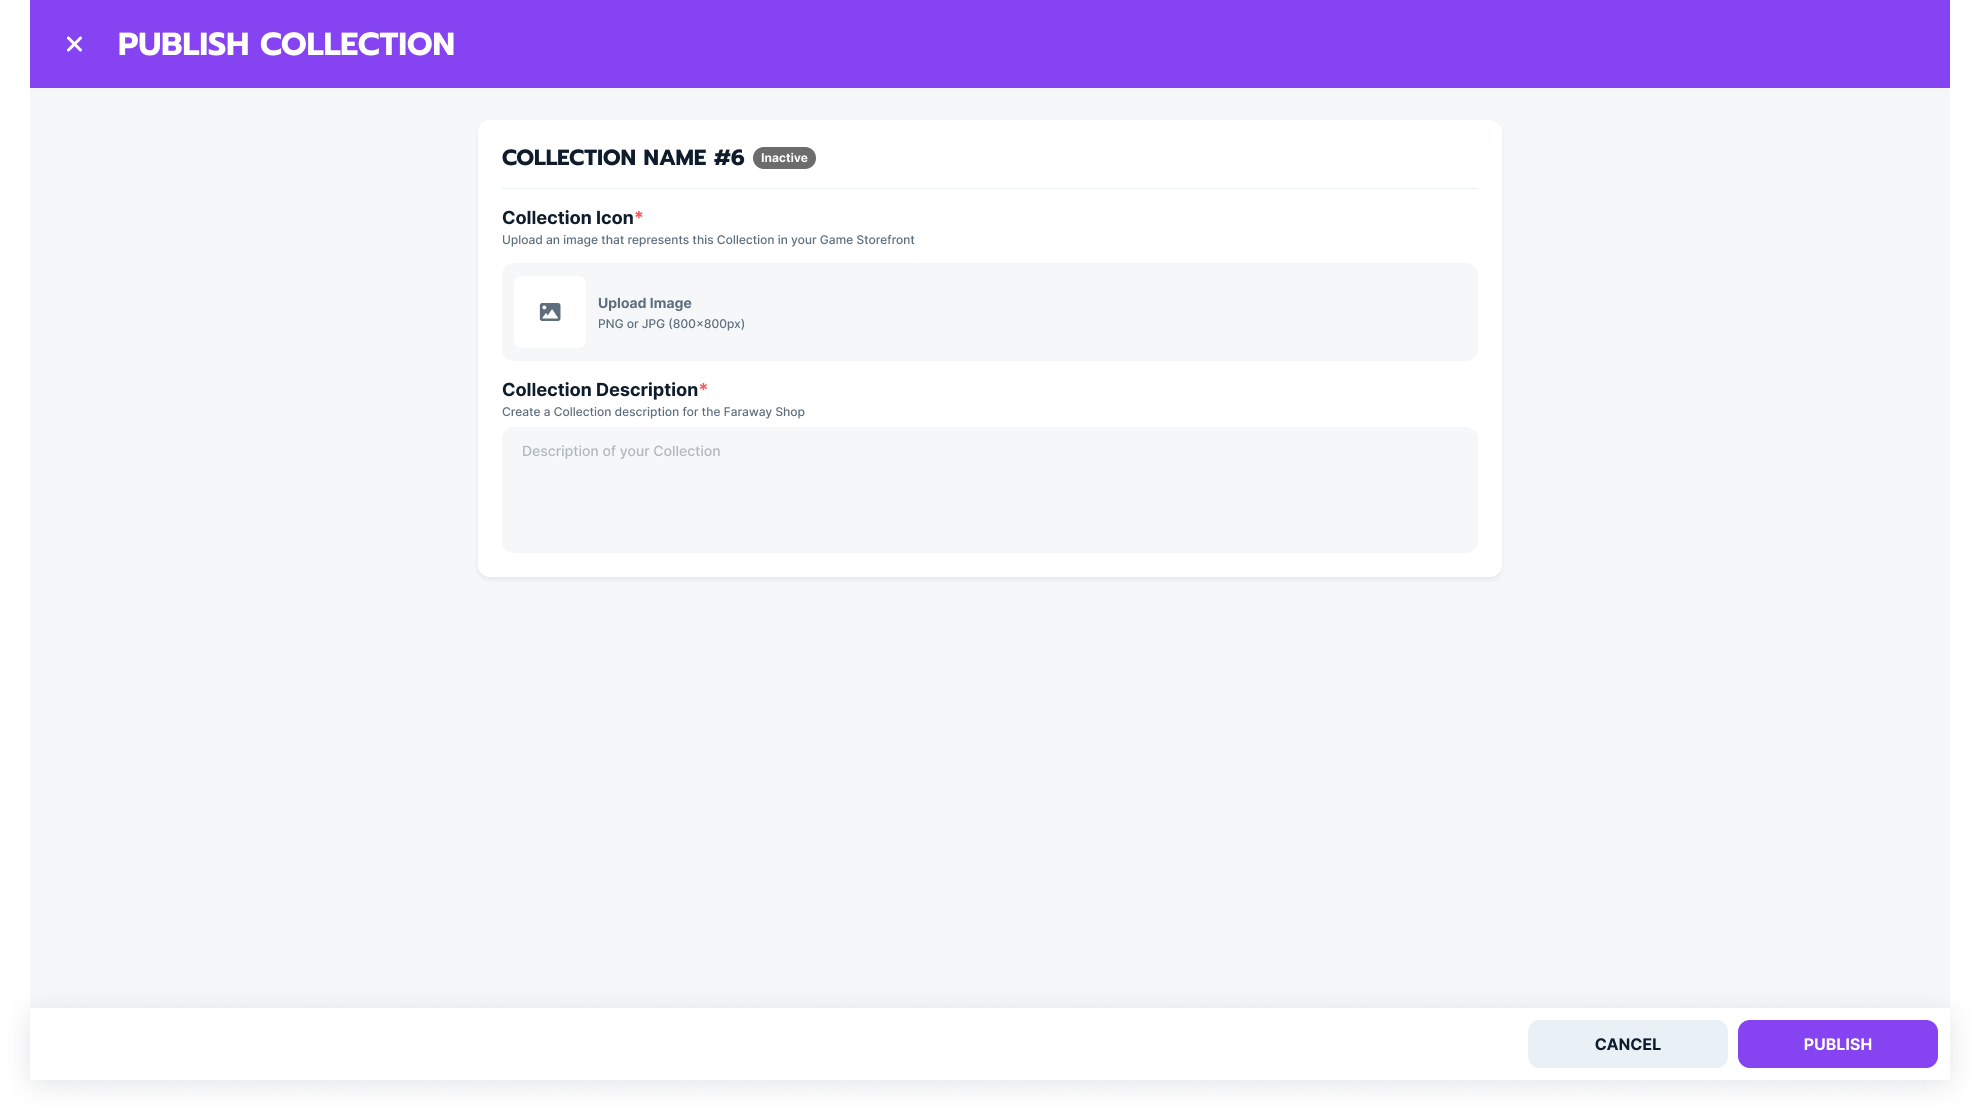
- Once successfully published, the Collection will have an Active status and will be available in the Faraway Shop
Note: You can edit active Collections after publishing them, but once published, you cannot remove a Collection from your Storefront.
List your In-App Purchases
You can list your In-App Purchases in your Storefront and create a fully functioning Web Shop for your game within minutes - revenue generated from this Web Shop pays out instantly via smart contract to the studio.
Steps to List an In-App Purchase
Required role: Account Owner, Admin, Developer, Marketing.
-
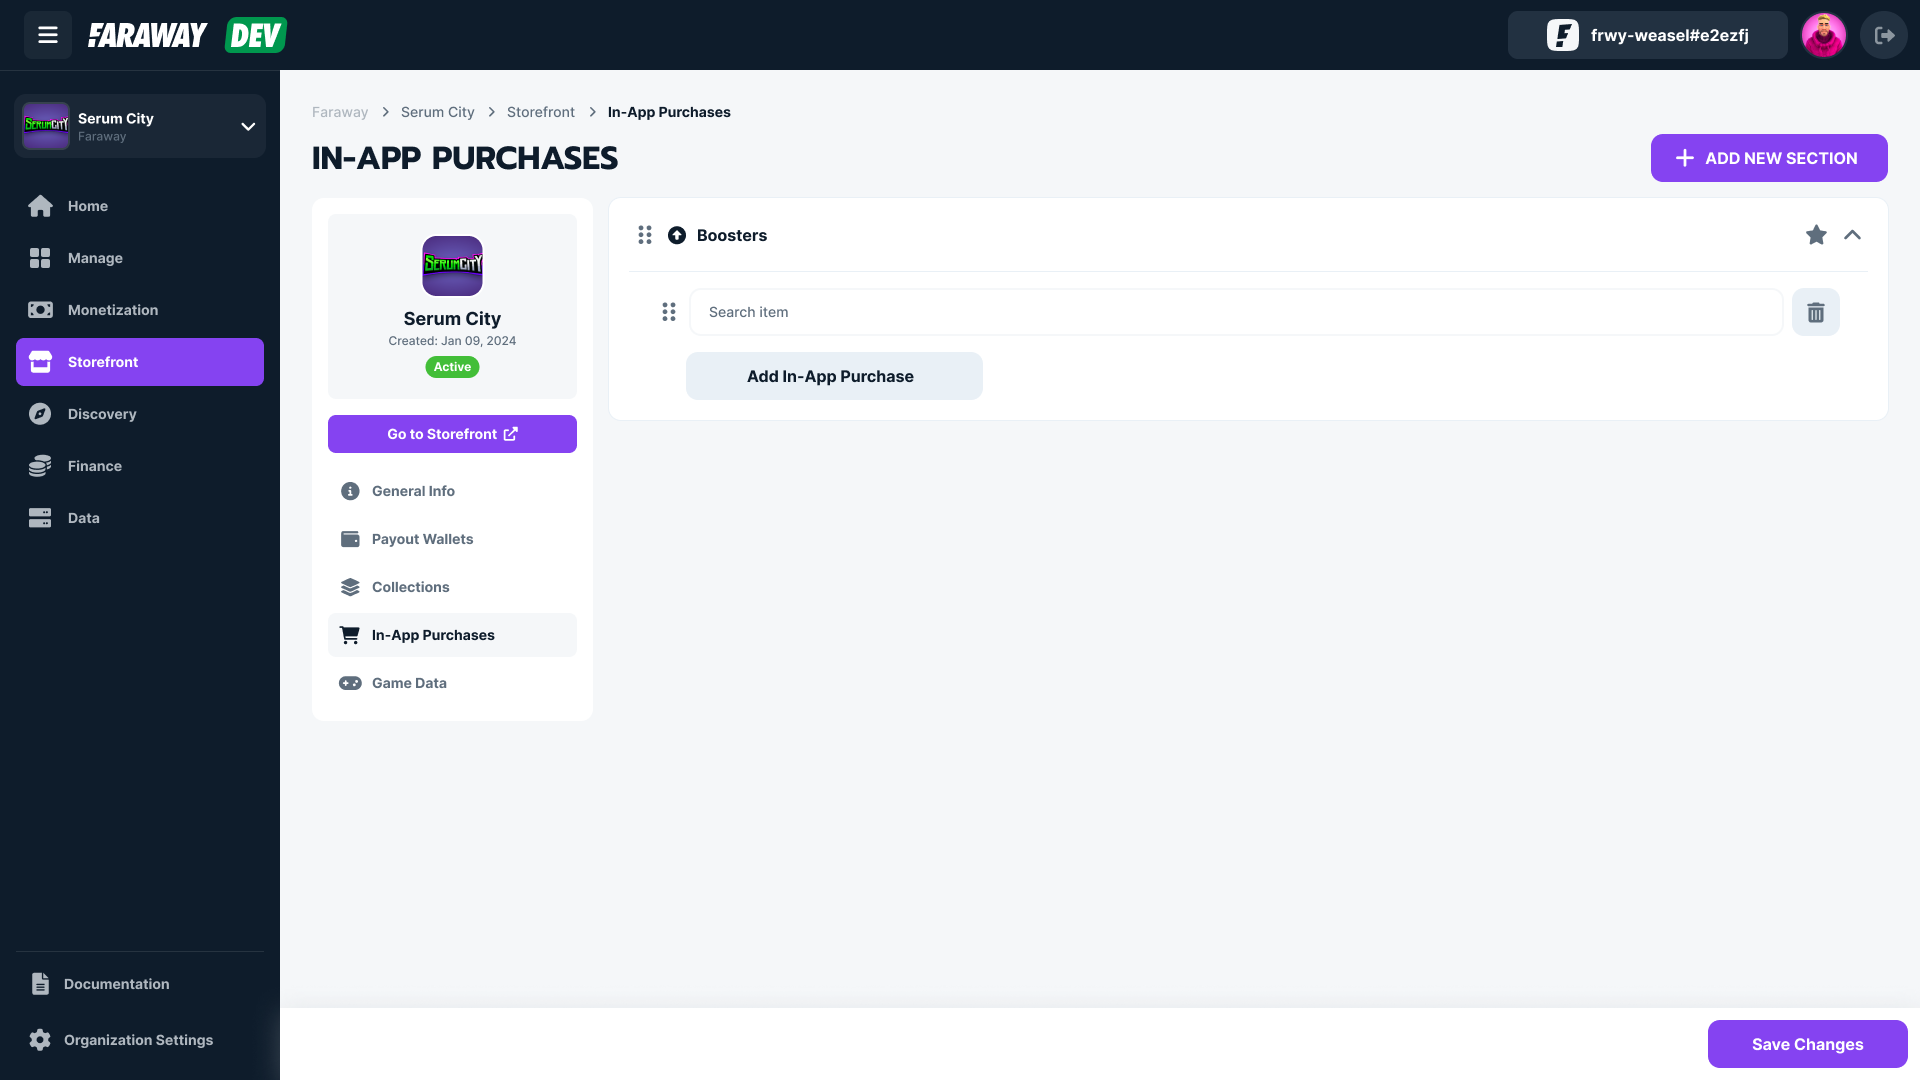
In the left sidebar, click on the Storefront section, then go to the In-App Purchases section.
-
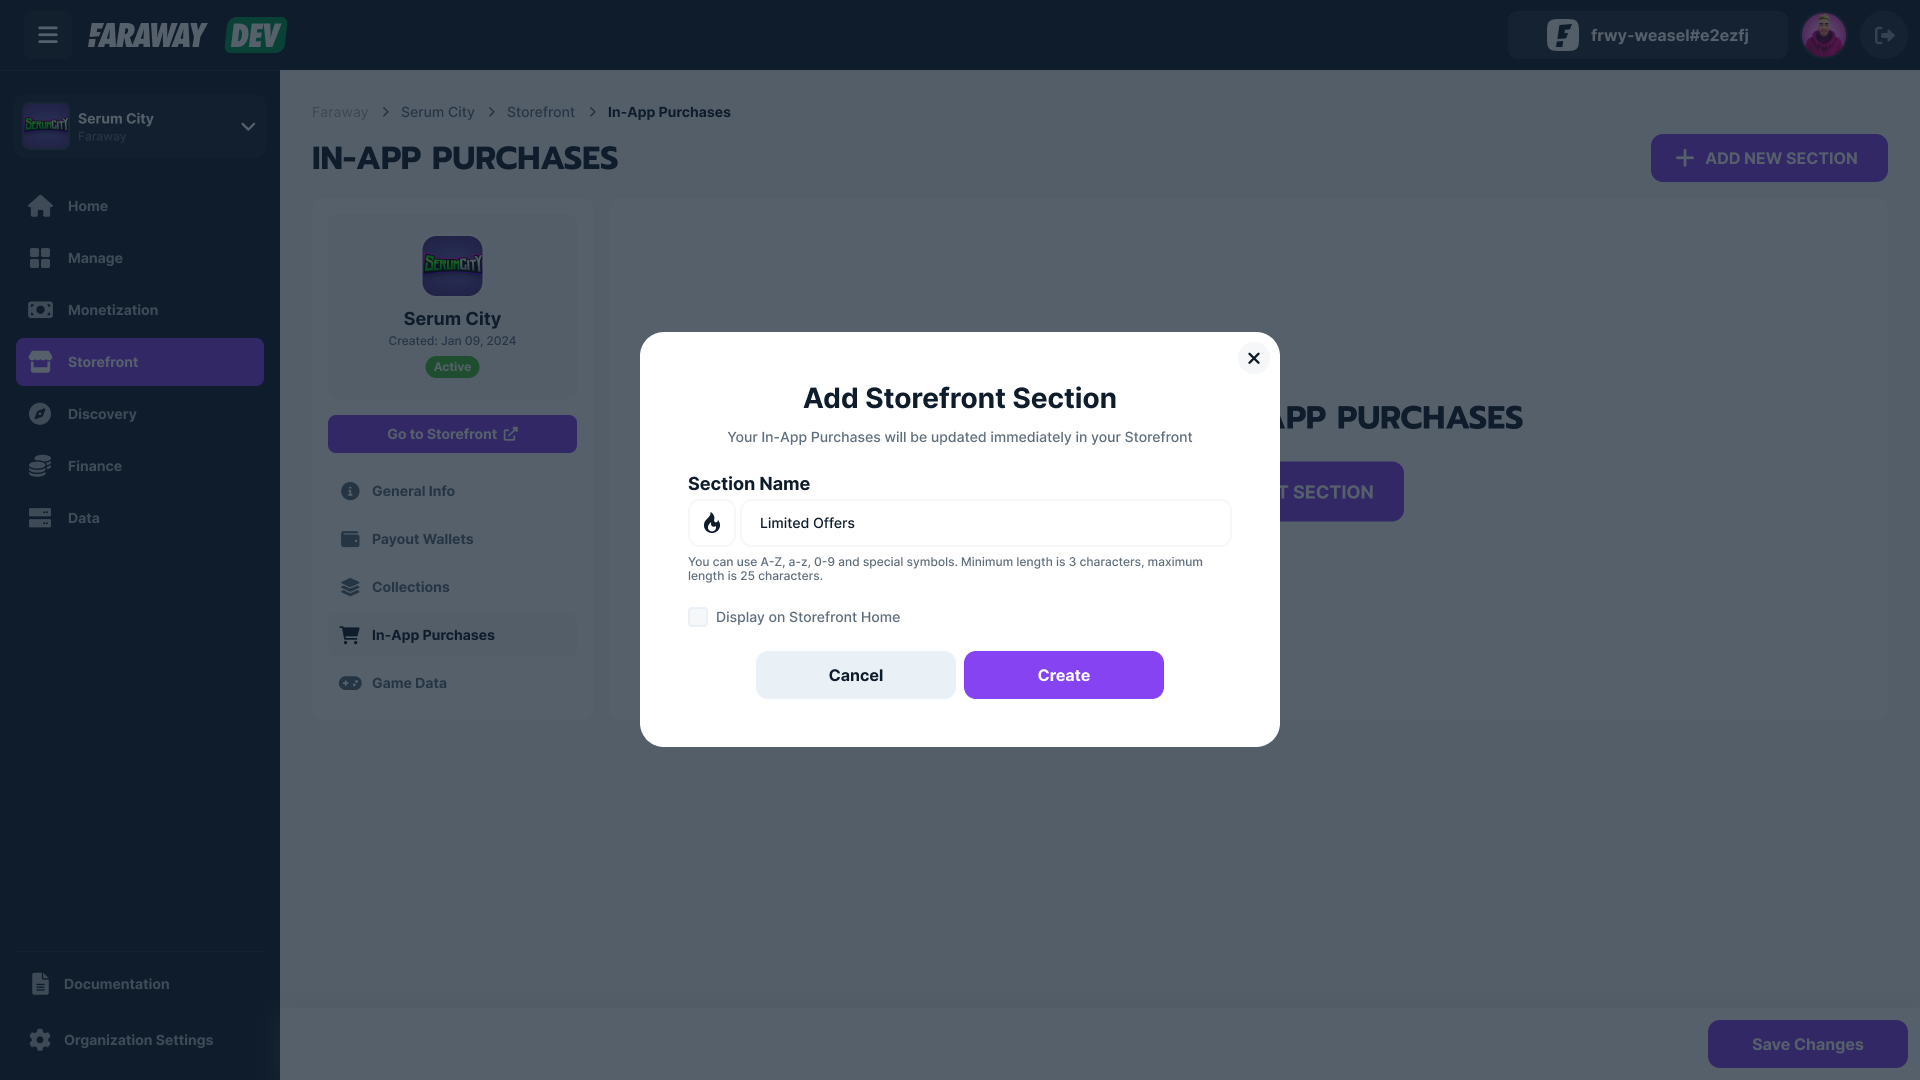
Click on Add New Section in the top-right corner of the page to create a new section for your purchases. In the popup that appears:
- Choose a Section Icon from the available options
- Enter the Section Name (3–25 characters, Latin characters, numbers, and special characters).
- Specify whether the section will appear on the main page of your Storefront.
Note: At least one section must be visible on the main page of your Storefront.
-
Once you have created a section, click on Add In-App Purchase within that section to list a new purchase.
-
In the dropdown list that appears, choose the purchase you want to list. You can search by Purchase Name or Purchase ID.
- Specify the order of purchases within the section and the order of sections on the Storefront by dragging and dropping them as needed
-
Save your changes by clicking on Save Changes.
Important: You can save changes only if:- There is at least one section on the main page
- Each section contains at least one listed purchase
Note: You can modify the settings for sections and available purchases at any time. Changes to section visibility, purchase listings, or their order will be applied immediately.
Updated 7 months ago